Drawing a monkey can be a delightful and rewarding experience, whether you’re a beginner or an experienced artist. Monkeys, with their expressive faces and playful nature, offer an engaging subject for artists of all levels. This guide will walk you through the process of creating a stunning monkey drawing from start to finish.
Understanding Monkey Anatomy
Before you start drawing, it’s essential to understand the basic anatomy of a monkey. Monkeys share many characteristics with humans, such as flexible limbs and expressive faces. Focus on the following key aspects:
- Head and Face: Monkeys have round faces with prominent eyes, a broad nose, and expressive mouths.
- Limbs: They have long arms and legs, often longer than their torso, which they use for climbing.
- Tail: Many monkeys have long, prehensile tails used for balance and grasping objects.
Studying photos or observing live monkeys can provide valuable insight into their anatomy and behavior. Understanding these elements will help you create a more accurate and lifelike drawing.
Gathering Your Supplies
To begin drawing a monkey, gather the necessary supplies. You don’t need anything fancy—just the basics:
- Pencil: A range of pencils, from hard (H) to soft (B), will allow for detailed line work and shading.
- Eraser: A good eraser is crucial for correcting mistakes and refining your drawing.
- Paper: Choose a quality drawing paper that can handle various pencil pressures.
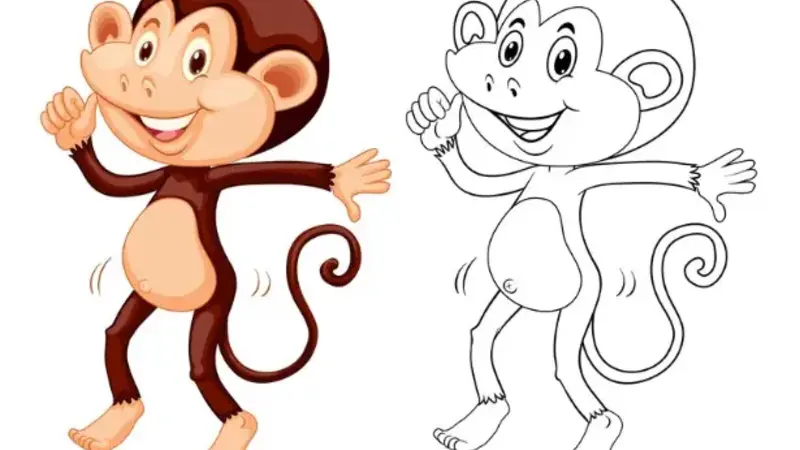
- Reference Images: Use photos or illustrations of monkeys to guide your drawing.
Having these supplies on hand will make the drawing process smoother and more enjoyable.
Sketching the Basic Shapes
Start your monkey drawing by sketching basic shapes. This step lays the foundation for your detailed drawing. Follow these steps:
- Draw the Head: Begin with a large oval or circle for the head. Monkeys have round faces, so keep the shape relatively circular.
- Add the Body: Attach a smaller oval or rectangle below the head for the body. Monkeys have compact bodies compared to their limbs.
- Outline the Limbs: Draw long, slightly curved lines extending from the body for the arms and legs. Use circles or ovals for joints to help position the limbs.
- Sketch the Tail: Add a long, curved line extending from the lower back for the tail. Make sure it’s flexible and can bend naturally.
By starting with basic shapes, you establish a clear structure for your monkey drawing. Adjust the proportions and positions as needed before moving on to detailed features.
Defining Facial Features
The face is the most expressive part of your monkey drawing. Focus on these details:
- Eyes: Draw large, round eyes with smaller circles inside for pupils. Monkeys have expressive eyes that convey emotion.
- Nose: Position a small, rounded triangle or oval in the center of the face for the nose.
- Mouth: Draw a curved line for the mouth, adding a slight curve at the ends for the lips. Monkeys’ mouths can be quite expressive, so adjust the curve to match the desired expression.
Adding these features will bring your monkey drawing to life. Pay attention to the placement and size of each element to capture the essence of a monkey’s face.
Detailing the Limbs and Body
Once the basic structure is in place, start adding details to the limbs and body:
- Arms and Legs: Refine the shapes of the arms and legs by adding muscle definition and joints. Monkeys have flexible limbs, so include some curvature to show movement.
- Hands and Feet: Draw the hands and feet with long fingers and toes. Monkeys have prehensile hands and feet, so include details like nails and grasping positions.
- Body: Add details to the body, such as fur texture and contours. Monkeys have a variety of fur patterns, so choose one that matches your reference image.
Detailing these elements will enhance the realism of your drawing and make the monkey appear more lifelike.
Adding Fur Texture
Fur texture can add depth and realism to your monkey drawing. Here’s how to achieve this effect:
- Light Strokes: Use light, short strokes to create the appearance of fur. Follow the direction of the hair growth for a natural look.
- Layering: Build up layers of pencil strokes to add volume and texture. Start with lighter strokes and gradually add darker ones for depth.
- Blending: Use a blending stump or your finger to smooth out the fur texture. This technique can help create a softer appearance.
Experiment with different techniques to achieve the desired fur texture. The key is to be patient and work gradually to build up realistic details.
Finalizing Your Drawing
After adding fur texture and refining details, it’s time to finalize your monkey drawing:
- Review Proportions: Check the proportions and make any necessary adjustments. Ensure that all parts of the drawing are in harmony.
- Clean Up Lines: Use an eraser to remove any unnecessary sketch lines and clean up the drawing.
- Add Shadows: Add shading to create depth and dimension. Focus on areas where light would naturally fall and create shadows.
Finalizing your drawing will give it a polished and professional look. Take your time with this step to ensure that every detail is accurate and well-executed.
Conclusion
Drawing a monkey involves understanding anatomy, gathering supplies, and carefully sketching and detailing the subject. By following these steps, you can create a dynamic and expressive monkey drawing that captures the essence of this fascinating animal. Remember to be patient and practice regularly to improve your skills. Happy drawing!
This comprehensive guide should provide you with a solid foundation for creating your monkey drawing. Feel free to adapt these techniques to fit your style and preferences.